Pulling Codes From Your 240sx ECU
[wpdevart_youtube]Gn_DIbGavTw[/wpdevart_youtube]
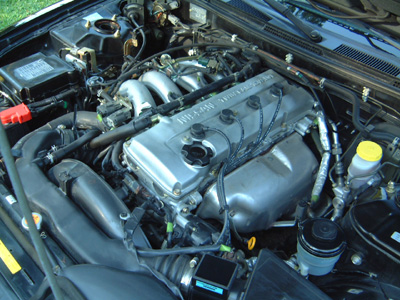
SOHC Ka24e Codes
The ECU modes
The electronic control unit have five mode:
Mode I- Exhaust gas sensor monitor (Normal mode)
Mode II- Mixture ratio feedback control monitor
Mode III- Self-diagnostic
Mode IV- Switch on/off diagnostic system
Mode V- Real-time diagnostics system.
The unit automatically return to normal mode I when the ignition is switched off.
Only mode III will be studied here. Troubles code are stored on mode III. The stored codes will be lost if the car battery is disconnected or if after selecting mode III, mode IV is selected.
3. Changing to mode III.
– Turn the ignition ‘ON’
– Turn the ECU adjusting screw fully clockwise.
The inspection lamps will flash once, the unit will be in mode I. The inspection lamps will flash twice, the unit will be in mode II. The inspection lamps will flash 3 times, the unit will be in mode III. The unit will continually cycle through the five modes until the screw is turn back.
– Turn the screw back after the lamp has flashed 3 times.
– You are now in self diagnostic mode III.
4. Reading the trouble codes.
The codes are indicated by the number of both red and green lamps. First the red lamp flashes and then the green one. The red lamp correspond to units of ten and the green lamp to units of one. For example, when the red lamp flashes once and the green lamp flashs twice, this signifies the number “12”.
The codes are:
11 Crank angle sensor circuit
12 Air flow meter circuit
13 Engine temperature sensor circuit
14 Vehicle speed sensor circuit
21 Ignition signal missing in primary coil
31 E.C.U. (E.C.C.S. control unit)
32* EGR function
33 Exhaust gas O2 sensor circuit
35* Exhaust gas temperature circuit
43 Throttle position sensor circuit
45* Injector leak
55 No malfunction
*California models only.
After the diagnostic, Turn the ignition ‘off’ to return to mode I.
To erase the code, use mode IV. The codes are automatically erased from memory when the starter is operated fifty times after the trouble is last noticed.
Ka24DE 1995+
2. The Diagnostic Modes
————————–
There are 2- Modes and 2- Conditions for the Engine to be in for running diagnostics:
All Modes are with the Ignition Switch in the ON position
Mode I (Engine OFF)- Bulb Check
Mode I (Engine ON) – Malfunction Warning
Mode II (Engine OFF)- Stored Self Diagnostic Results
Mode II (Engine ON)- Exhaust Gas Sensor Monitor
Note: The ECU will automatically return to Mode I when the ignition is switched OFF. When the ECU is changed from Mode II back to Mode I by using the Mode Selector, the malfunction code(s) stored for Mode II will be erased. More on this later.
3. Changing Modes
Note: Switching Modes is not possible when the engine is running.
* Turn the Ignition Switch ON.
* The ECU is now in Mode I.
* To switch to Mode II:
Turn the ECU Mode Selector fully CLOCKWISE, hold for at least 2-seconds and then return the Mode Selector to it’s original position. You are now in Mode II.
* Return to Mode I by turning the Mode Selector fully CLOCKWISE again, holding for another 2-seconds and turning it back to the original position.
Note: Doing this will ERASE any Malfunction Codes that are stored in the ECU for Mode II.
Example: If you found a Malfunction Code of 34 when you very first switched to Mode II and then cycled back to Mode I, then again to Mode II, you’ll get a 55 (everything’s OK) code. This is assuming that you didn’t start the car between changing modes. When you start the engine, any current malfunction codes will be store by the ECU until you erase them or they get dumped.
Malfunction Codes are stored by the ECU for 50 times of cranking the starter. Then they are erased. If the same conditions are present, the Malfunction Code will be stored again for 50 cranks of the starter. And so on…
4. Reading the Malfunction Codes:
The Malfunction Codes are indicated by the number of flashes by the RED L.E.D. and the Check Engine Light. You can read either one. They flash the same information. For example, when the RED L.E.D. flashes once and after a short pause flashes twice, this signifies the number “12”.
Note: If you find that your looking at a RED L.E.D. and a GREEN L.E.D., you’ve got a different ECU than is described here. See the FAQ on this same page that was written by Richard Lestage for the SOHC ECU!
______________________________________________
ALL TESTS ARE PERFORMED W/ THE IGNITION SWITCH “ON”
Mode I (Engine OFF)- Bulb Check:
In this Mode, the RED L.E.D. in the ECU and the Check Engine Light stay ON. If either remain OFF, check the bulb.
Mode I (Engine ON) – Malfunction Warning:
RED L.E.D. is OFF = OK
RED L.E.D. flashes =
For California Models Only:
Code # Description
12 Air flow meter circuit
13 Engine temperature sensor circuit
14 Vehicle speed sensor circuit
31 E.C.U. (E.C.C.S. control unit)
32 EGR function
33 Exhaust gas O2 sensor circuit
35 Exhaust gas temperature circuit
43 Throttle position sensor circuit
45 Injector leak
For Non-California Models:
RED L.E.D. ON = The ECU’s CPU or the Crank Angle sensor is malfunctioning.
______________________________________________________
Mode II (Engine OFF)- Stored Self Diagnostic Results
Code # Description
11 + Crank angle sensor circuit
12 E Air flow meter circuit
13 E Engine temperature sensor circuit
14 E Vehicle speed sensor circuit
21 + Ignition signal circuit
31 E E.C.U. (E.C.C.S. control unit)
32 * E EGR function
33 E Exhaust gas O2 sensor circuit
34 Detonation sensor circuit
35 * E Exhaust gas temperature circuit
43 E Throttle position sensor circuit
45 * E Injector leak
54 Signal circuit from A/T control unit to ECU (A/T only)
55 No malfunction in the above circuits
* = California models only
E = Check Engine light will show this code.
+ = Check items causing a malfunction of the crank angle sensor 1st, if both #11 and #21 are displayed at the same time.
Mode II (Engine ON)- Exhaust Gas Sensor Monitor
* Warm up the engine and see that the Temperature Gauge is in it’s usual position.
* Run the engine at about 2,000 RPM for about 2- minutes under no-load conditions.
* Make sure the RED L.E.D. or the Check Engine Light goes ON and OFF more than 5- times every 10- seconds; measured at 2,000 RPM under no-load. (This is easiest to do while sitting in the driver’s seat and watching the Check Engine Light.)
After the diagnostic, Turn the ignition ‘off’ to return to mode I.


More Stories
Gauges by GlowShift
240sx Powering Up ECU without Car